Inserting an imagemap
An imagemap is a graphic image with multiple different clickable areas, with each area linked to a different web page.
To insert an imagemap:
Click on the Insert > Imagemap menu option.
Click on the
 button.
Click on the Create a new map radio button and click on the button.
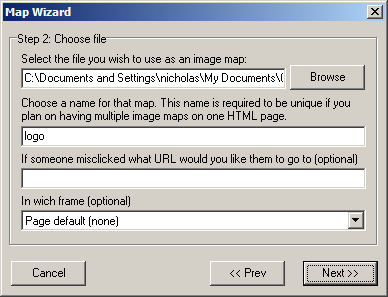
Select the image file that you want to use using the button.
Enter the name for the imagemap in the second field.
Enter the URL for the entire imagemap in the third field, if required.
Select which frame the imagemap links link to in the bottom drop-down list, if required.

Click on the Next button and then the Finish button.
To create a specific area in the image, using the
 ,
,  , or button.
For each area, you need to enter the following information:
URL - Enter the link for the area.
OnMouseOver text - Enter the text that appears when the mouse is placed over the area.
ALT - Enter the alternative text for the area.
Destination frame - Enter the destination frame for the link.
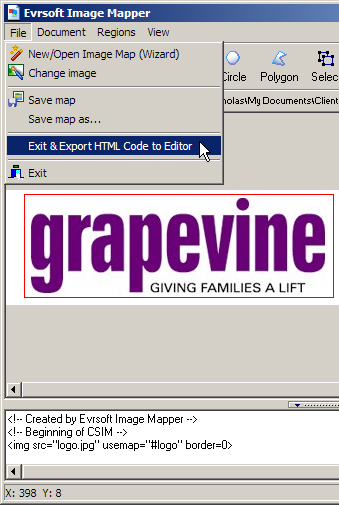
Once you have finished the imagemap, click on the File > Exit & Export HTML Code to Editor menu option.